Beauty How-To: Tight Lining
When it comes to beauty products, I’m a bit of a brand whore. I’ve been using the Clinique 3-step skincare line since middle school and I love almost everything in Sephora. For several years, the only eyeliner I would let anywhere near me was Clinique’s Quickliner in either “Really Black” or “New Black” – that is, until I ran out when I was low on cash and had to settle for *gasp* a drugstore brand. So off I went to Duane Reade to pick up L’Oreal’s Infallible liner, which my friend recommended. She also pointed out that Beyonce was the spokesperson, so I figured if I couldn’t buy my favorite liner then I guess using the same product as Beyonce wouldn’t be a bad second choice.
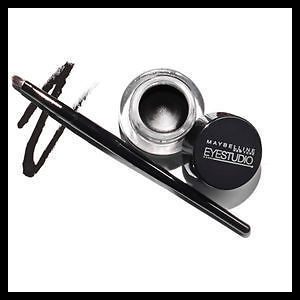
I LOVED Infallible and it became my new go-to… until something happened and all of a sudden, my friend and I were noticing that it kept running, coming off, and didn’t look so great after an hour or so (not sure if they changed the formula or…?). When it was time to restock, I decided to pick up a pot of Maybelline’s “Eye Studio” gel liner instead. I’ve always wanted to try the gel pots and I liked that it came with its own brush. My conclusion? It’s amazing. I was worried that I wouldn’t be able to smudge it and that it would be too solid of a line, but it’s perfect and stays put for hours. This leads me to my new favorite makeup trick: tight lining.
I learned about the tight lining technique when I was surfing Pinterest at 3am (I love you, insomnia) and discovered that it gives you a really nice look for everyday wear. Although I love me a dark, sultry, smokey eye, it’s not really necessary if I’m walking one and a half blocks to the laundromat on a Tuesday afternoon. Tight lining gives you just enough definition to make your eyes stand out, but still looks natural – and now, this is the only technique I use. Although I’ve been using my gel pot, you can use whatever eyeliner you have except liquid. Here’s how:
1) I always prep with concealer, powder, and I curl my lashes so it doesn’t mess up my liner after applying.
2) Instead of lining over your lashes and along the lash line, lift your lid up and line UNDER it – but don’t draw a straight line. You want to wiggle the liner between your lashes to fill in the gaps, creating a darker base which makes your lashes look fuller.
3) Do the same for your bottom lashes. Fill the liner in between your lashes – I also do my water line, because I don’t like that “bare” look between my lower lashes and eyeball.
4) Finish with a couple coats of mascara (I’ve been using Smashbox lately and I lurrrrrve it).

BEFORE

AFTER